
Select and edit elements
Select elements and read their properties
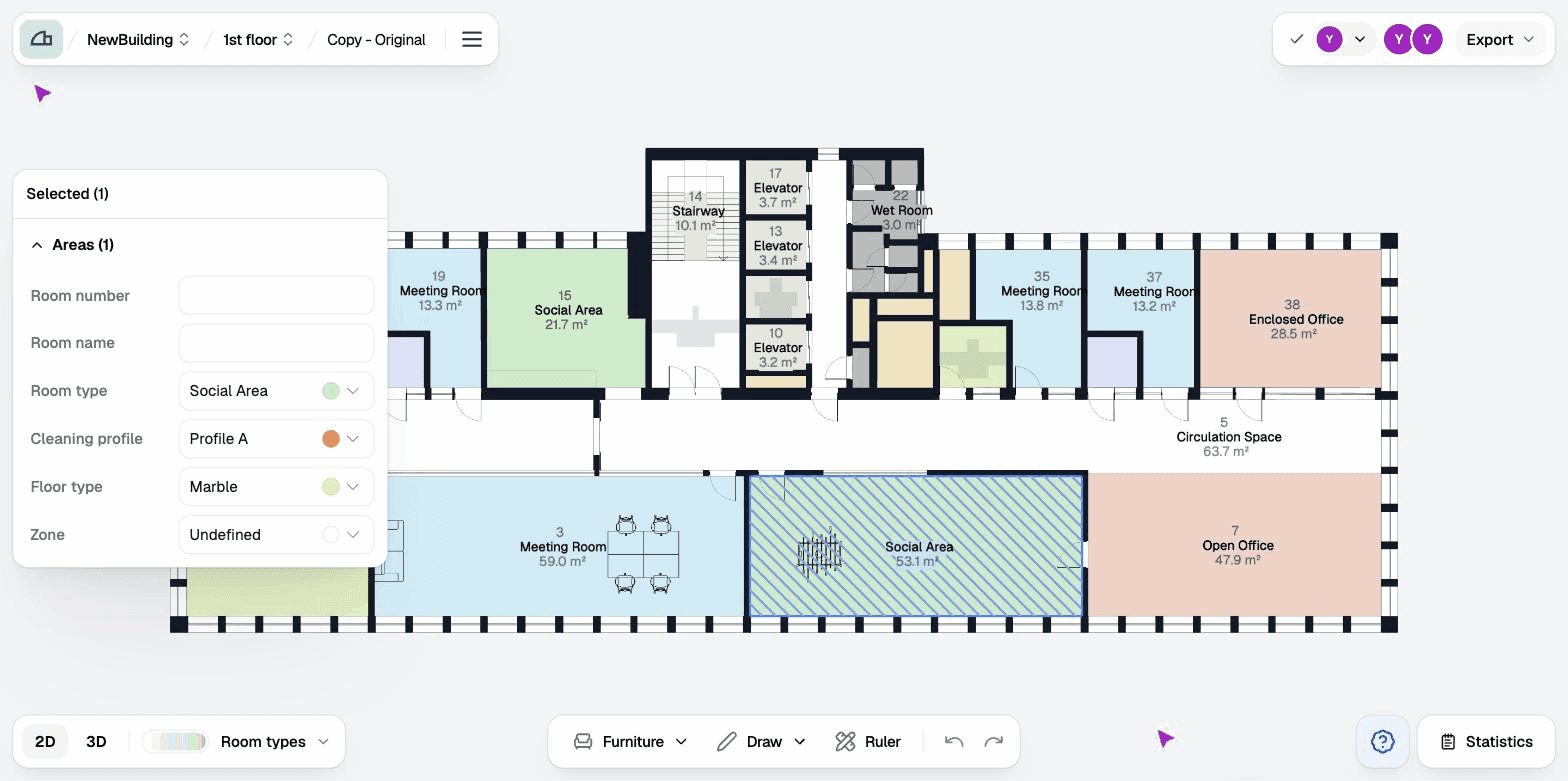
Click an element to select it. A Selected panel opens on the left, listing what you picked and the properties you can change: for an area that is its number, name, room type, and the scheme values set on it.
Rectangle selection
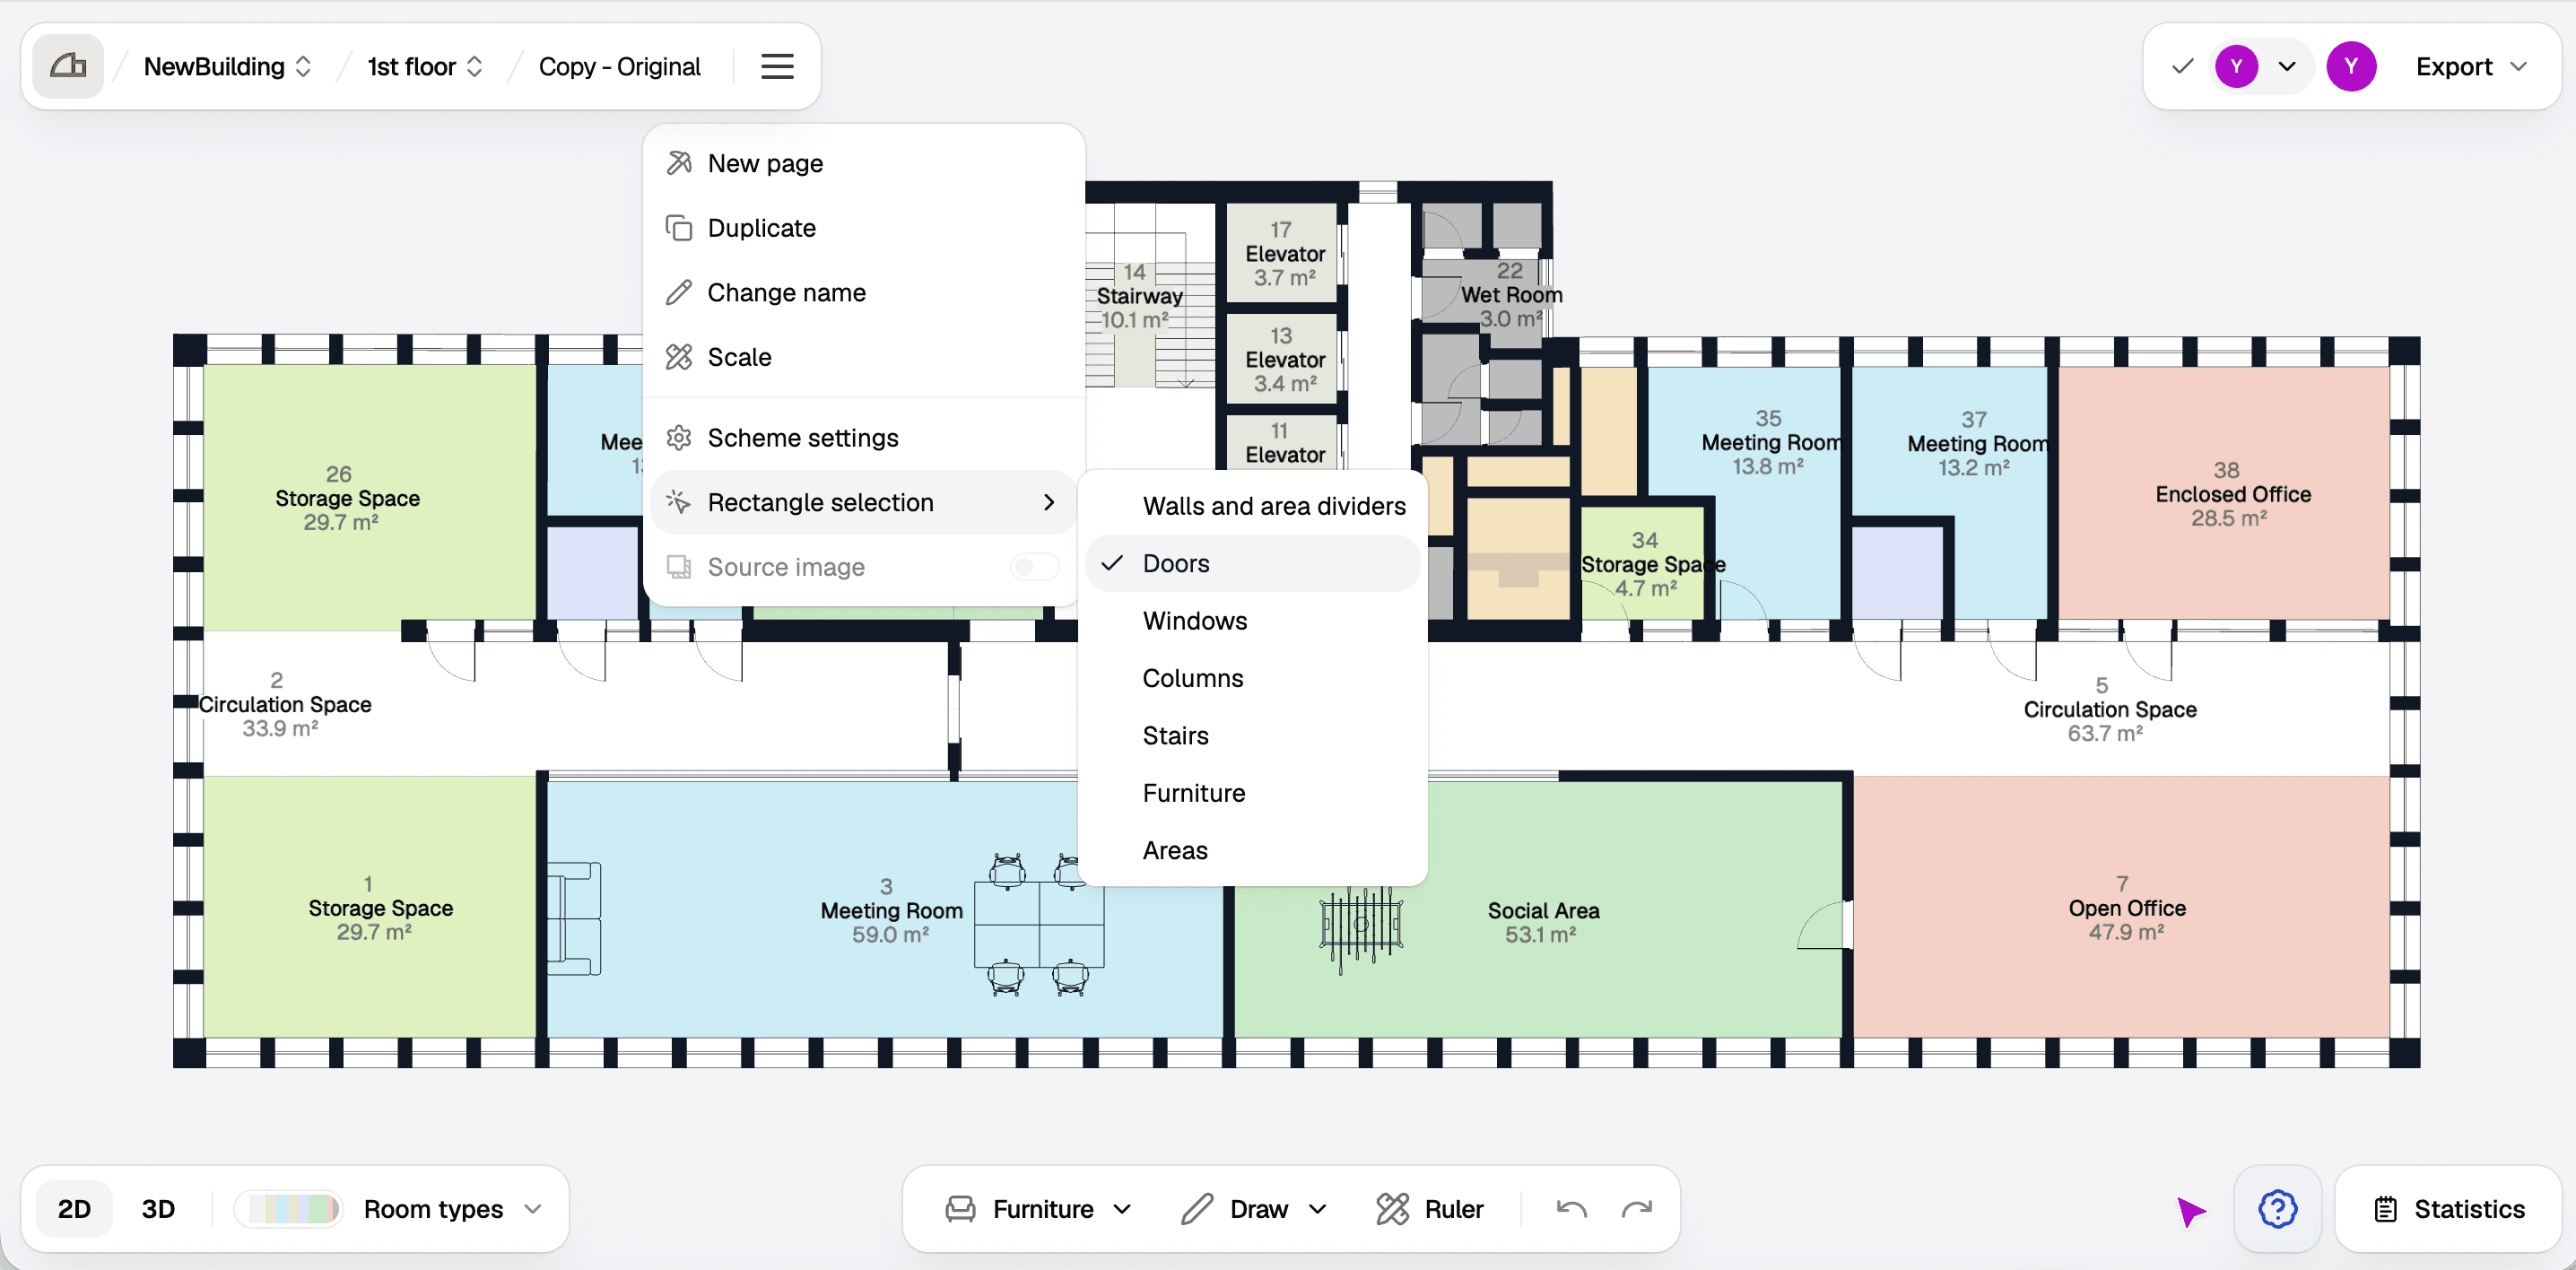
Rectangle selection in the plan menu decides what a dragged rectangle is allowed to pick up. Tick the element types you want it to catch: walls and area dividers, doors, windows, columns, stairs, furniture, or areas.
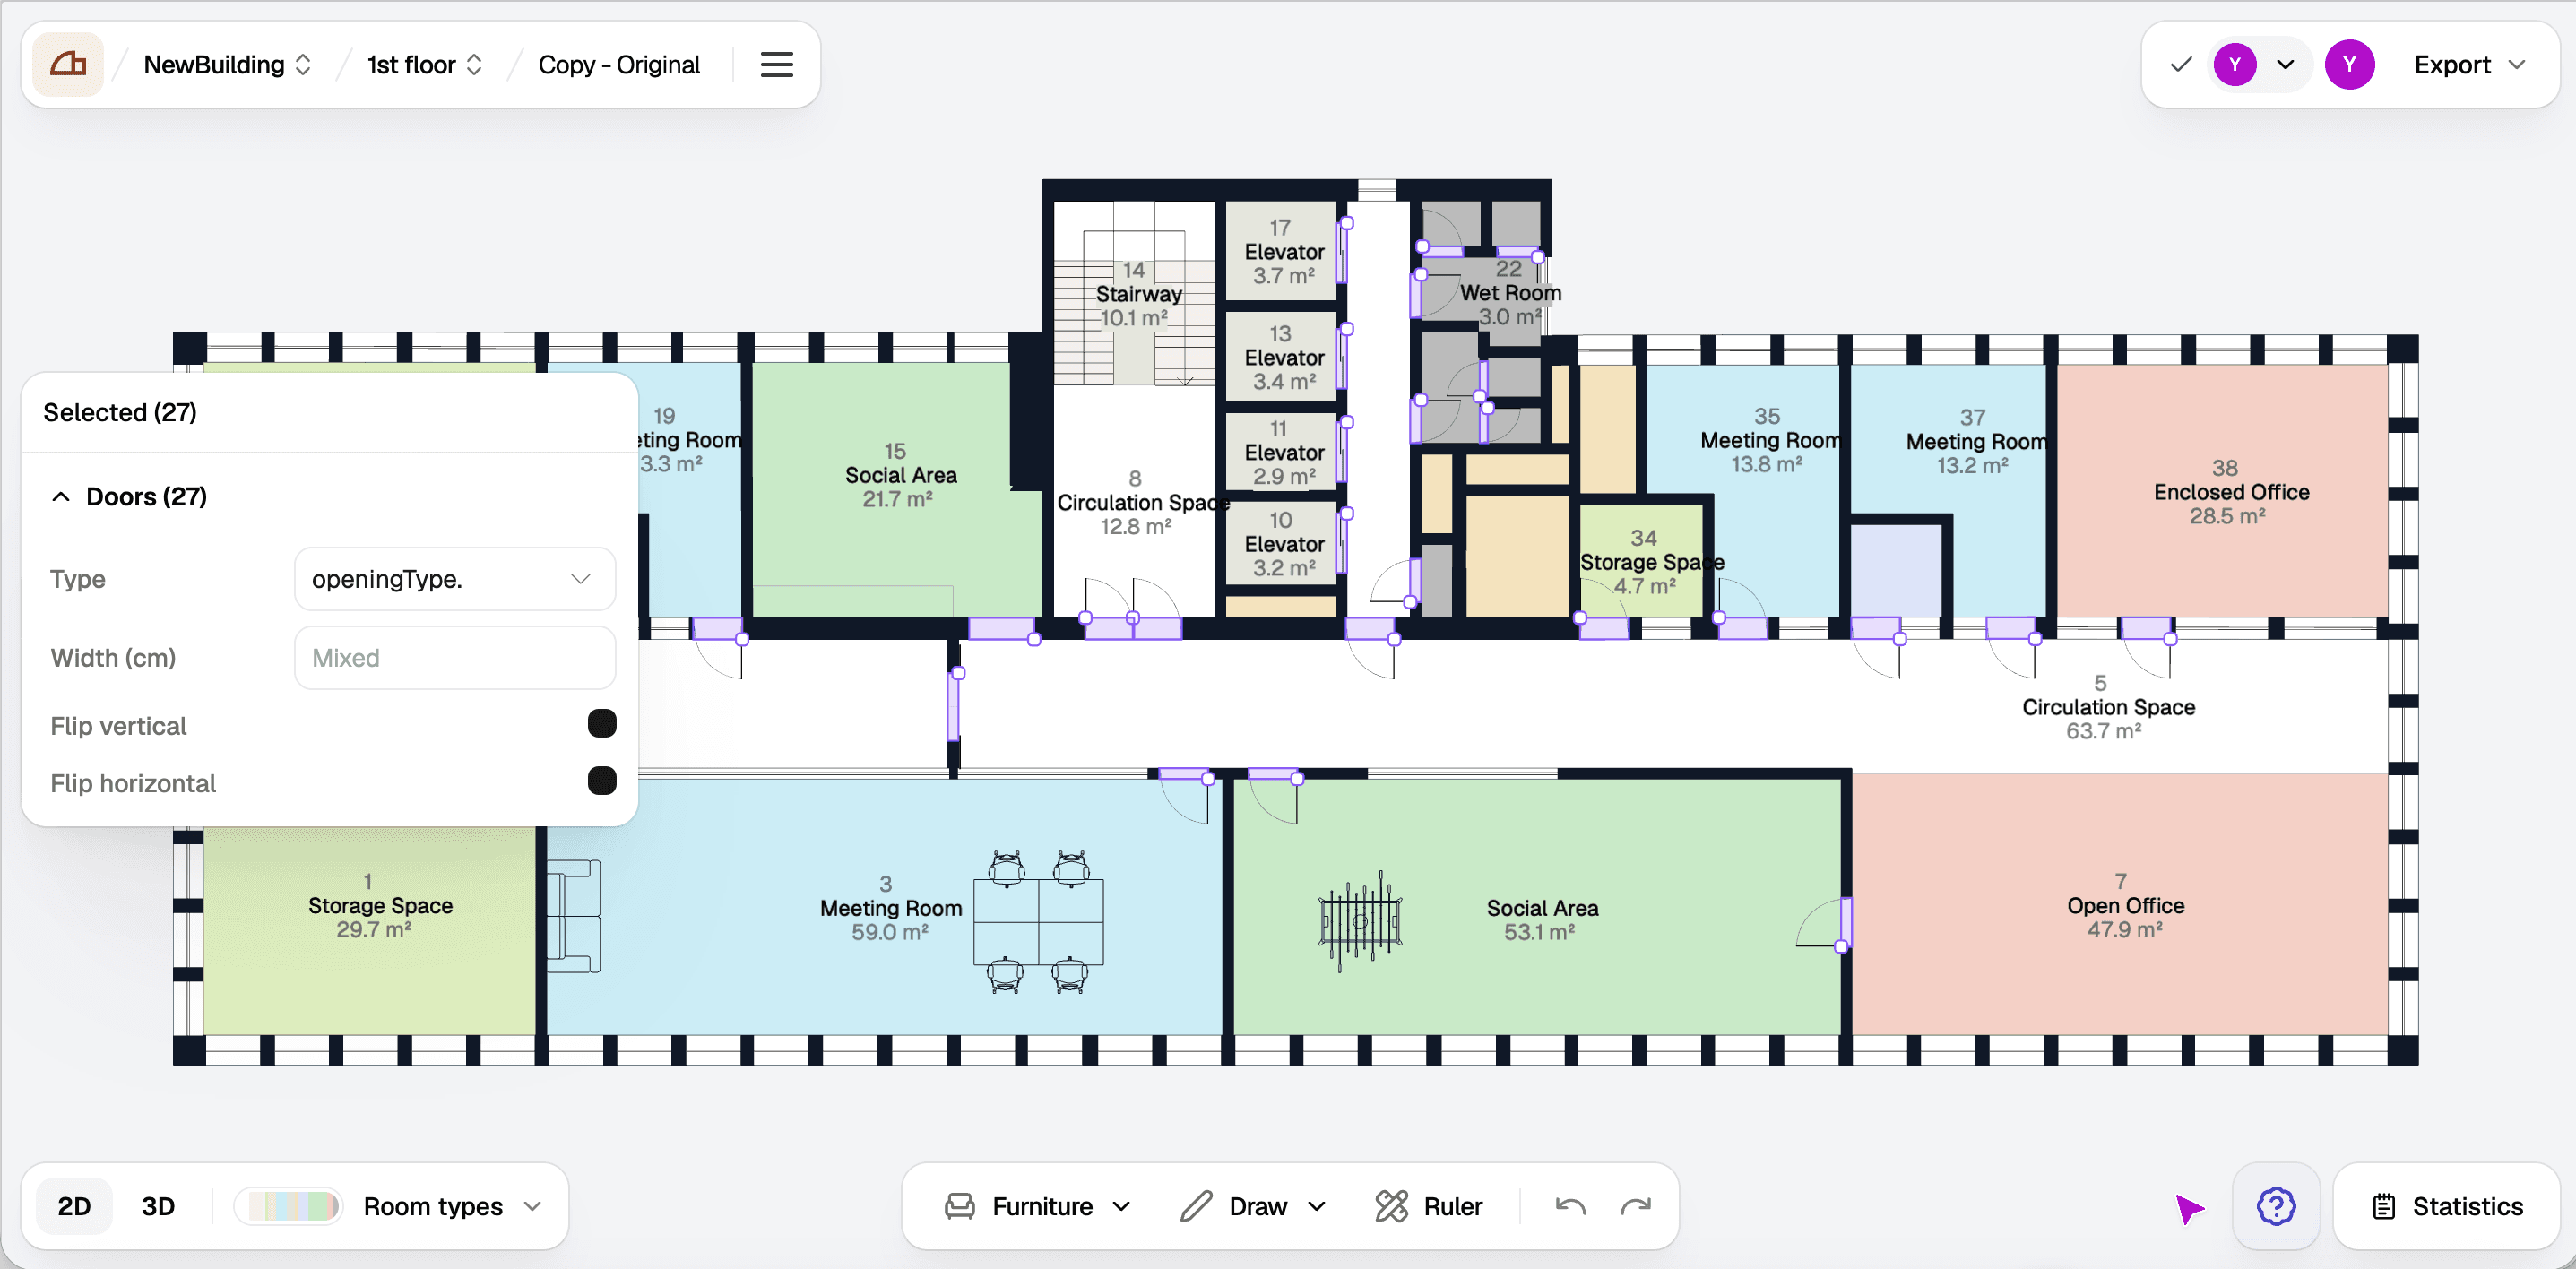
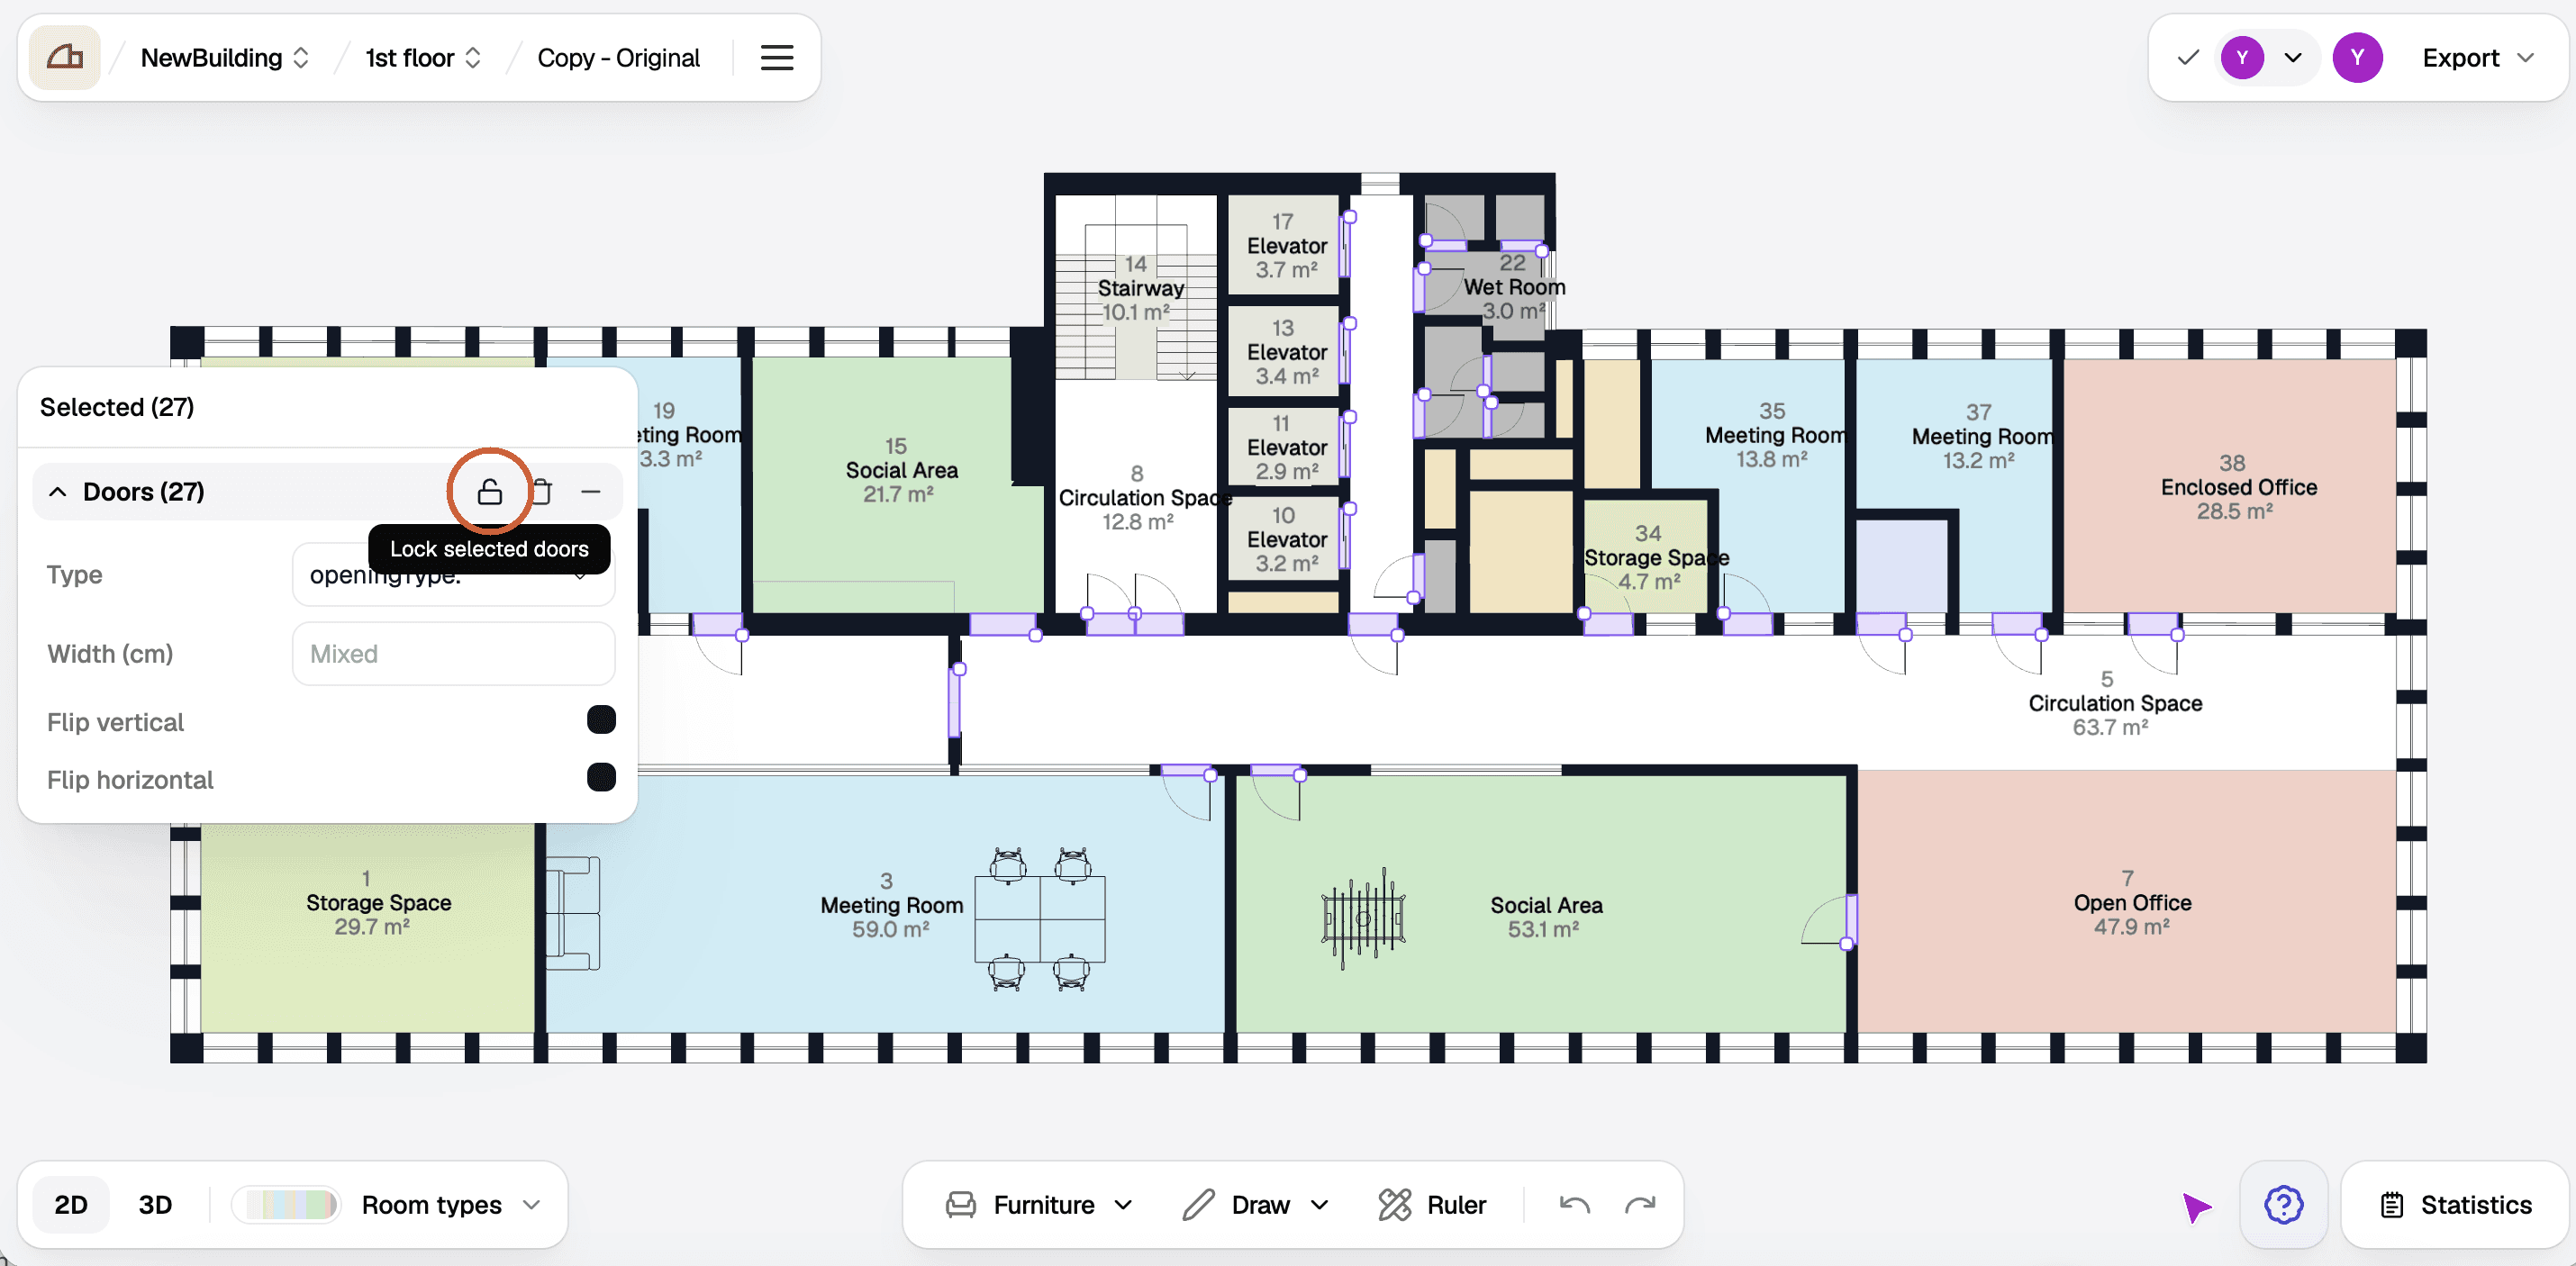
Then hold Shift and drag a rectangle over the plan. Only those types are selected; anything else inside the rectangle is left alone. Here only Doors is ticked, so the rectangle picked up 27 doors and nothing else, and the properties panel edits all 27 at once.
Selecting from Statistics
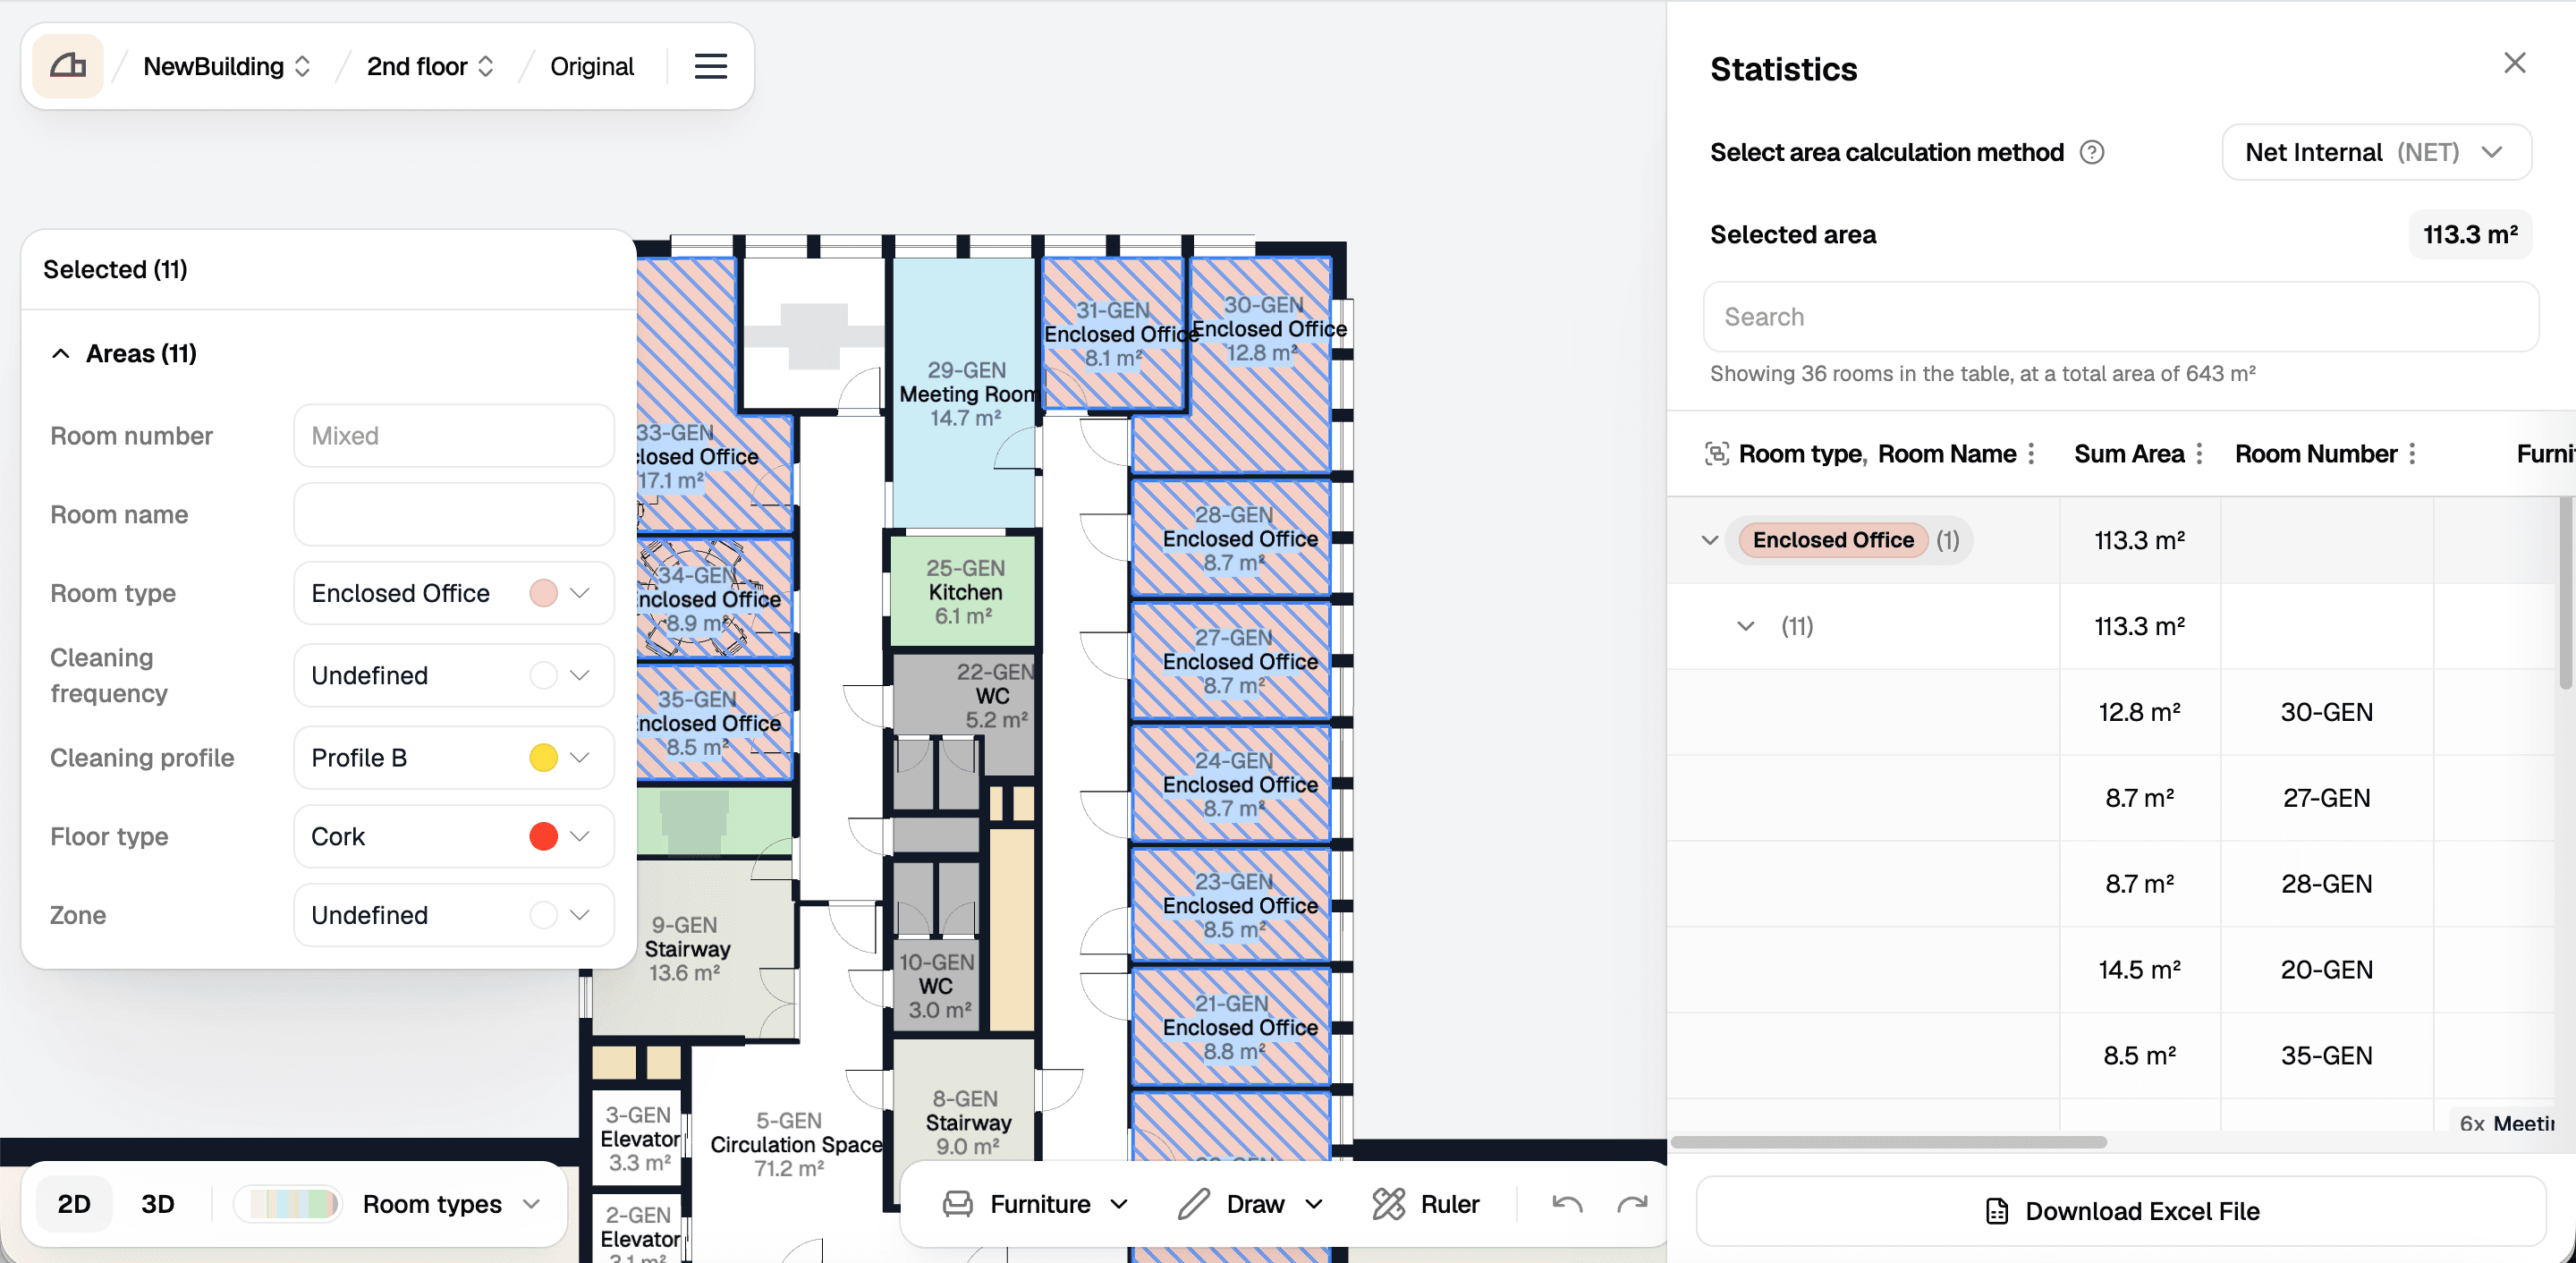
Rows in the Statistics panel are selectable too. Click a room type to select every area of that type on the plan, or expand it and click a single row to select just that room. The properties panel opens on whatever you picked, so a whole room type can be edited in one go.
See Statistics for the rest of the panel.
Locked elements
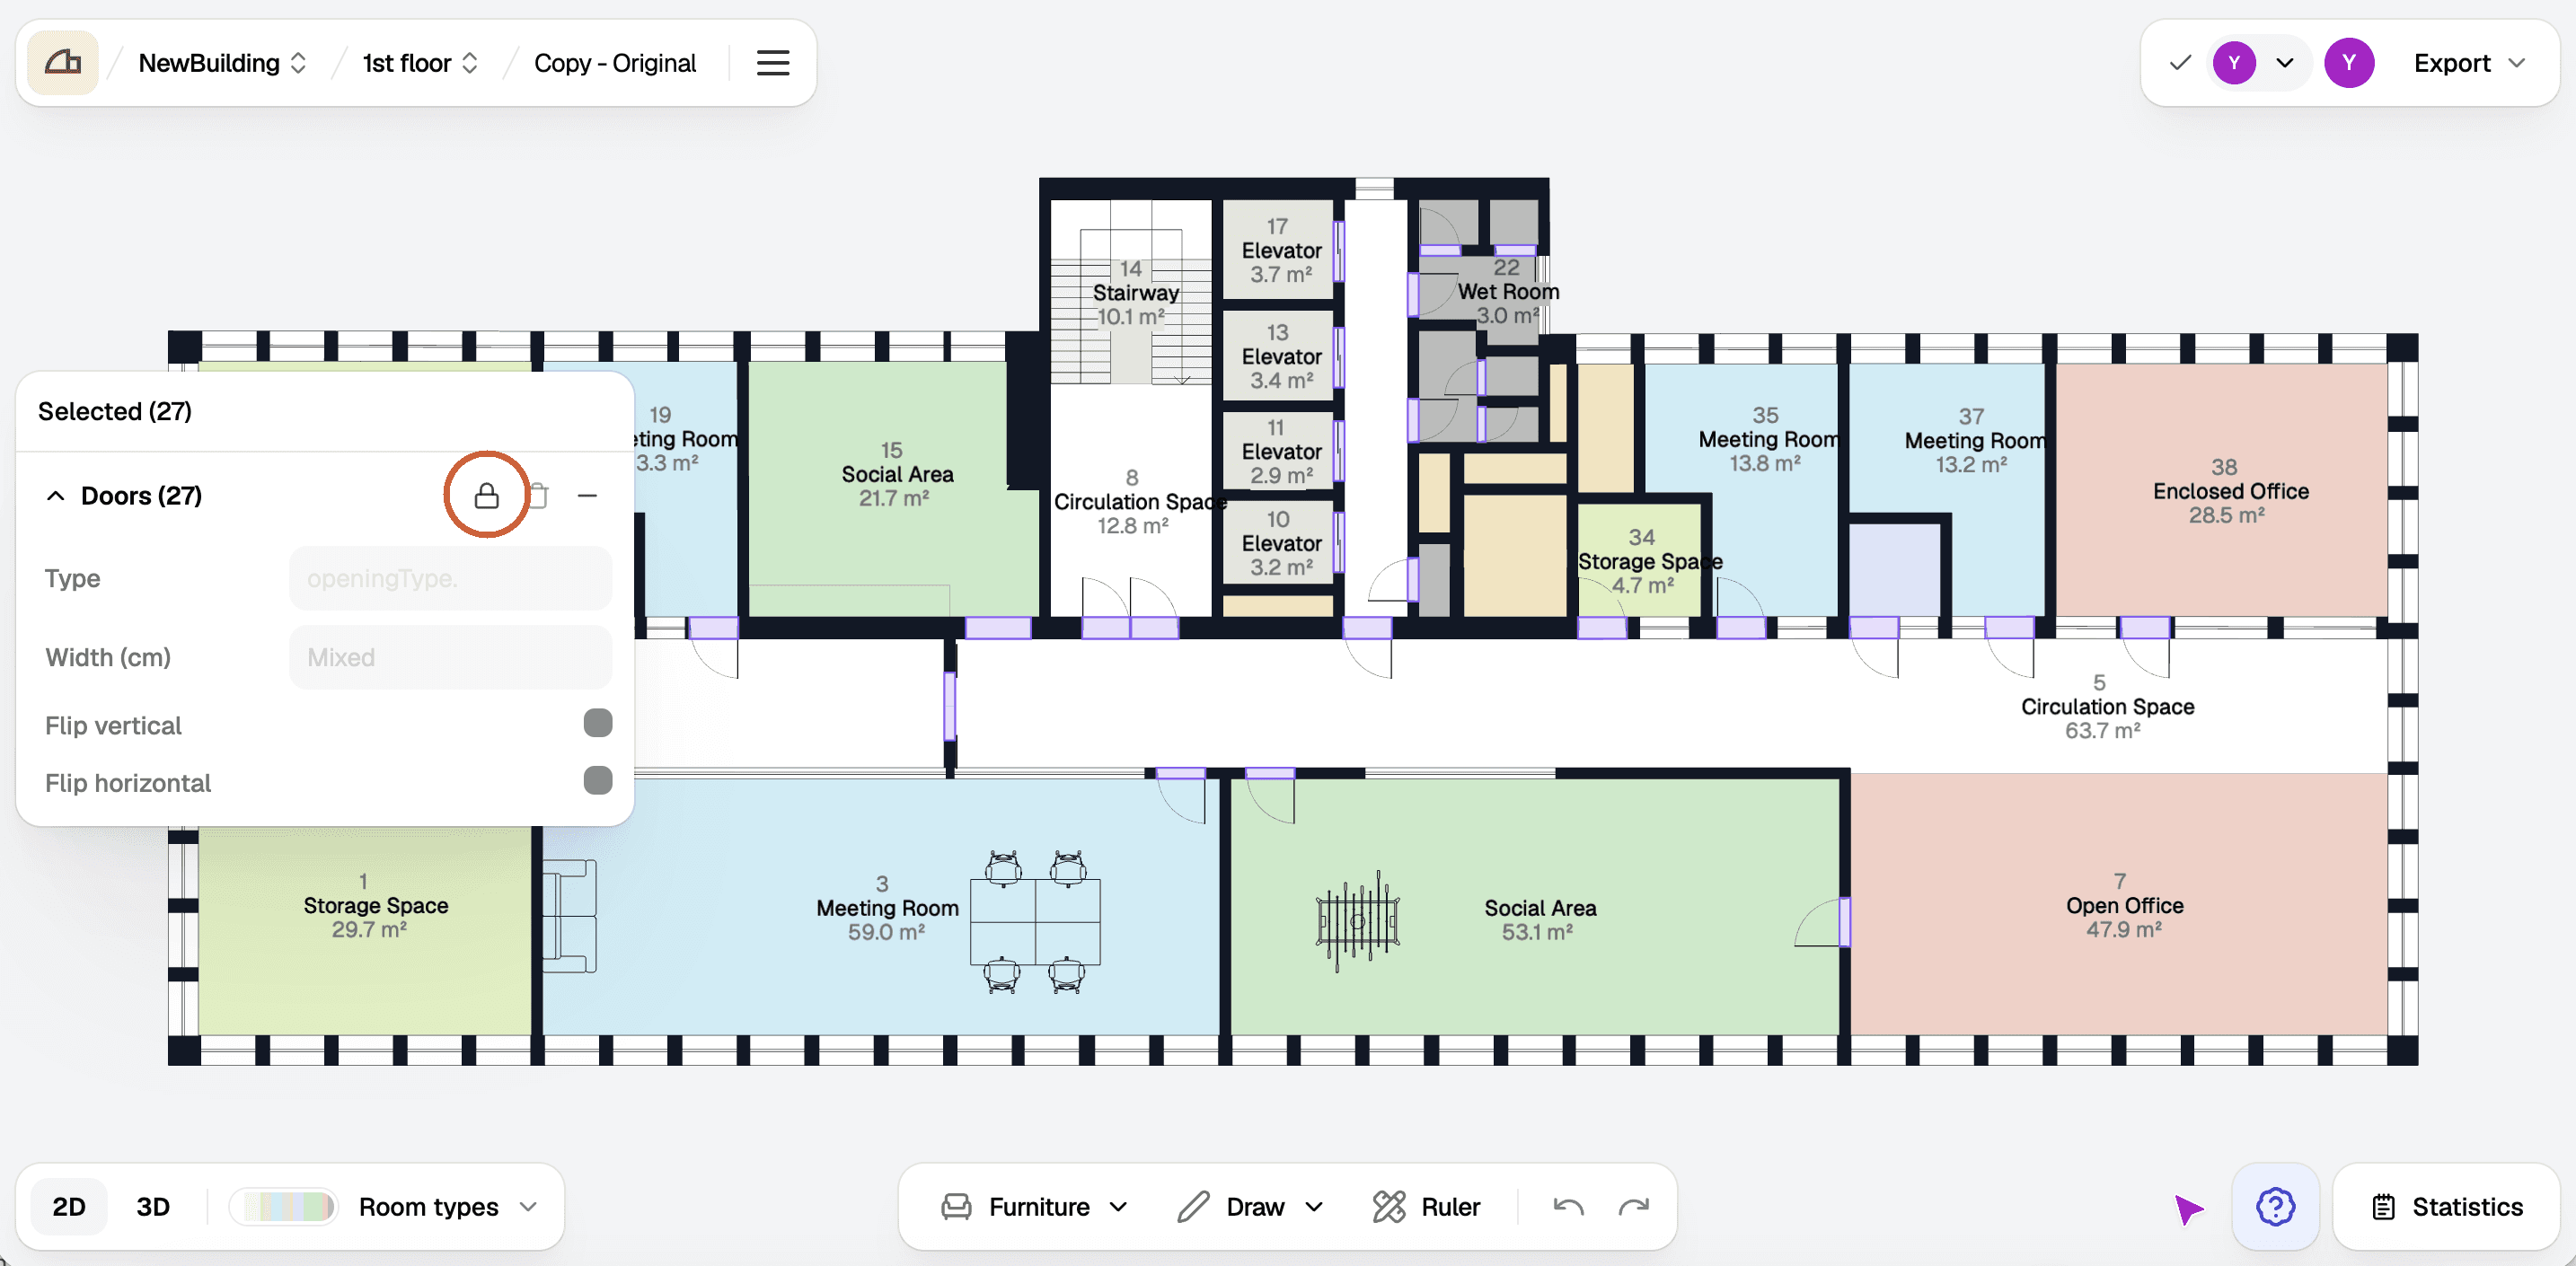
Locking keeps elements from being changed by accident. Select what you want to protect and click the lock button in the properties panel, circled below. It applies to everything in the selection, so all 27 doors lock at once.
Locked elements are marked as locked on the plan, and their properties are greyed out so nothing can be edited by mistake. Click the same button again to unlock them, and they can be changed like anything else.
Shortcuts
| Key | Command |
|---|---|
| Shift and click | Select several elements |
| Escape | Cancel the current action, or deselect |
| Delete or Backspace | Delete what is selected |
| Ctrl + C, Ctrl + V | Copy and paste furniture |
| Ctrl + Z | Undo |
Shortcuts only work while the plan itself has focus, so click the plan first if nothing happens.